Welcome to our DIY guide on how to make pressed flower art! 🌼💐 We’re excited to share with you the beauty of capturing nature’s beauty. You can learn how to make pressed flower art with our easy-to-follow DIY guide!
In this article, we’ll take you through the process of creating pressed flower art. We’ll cover everything from materials needed to displaying your final piece. Whether you’re a crafty person or just looking for a new hobby, we’ve got you covered! 🎨 You’ll discover the basics of how to make pressed flower art and get started on your creative journey!
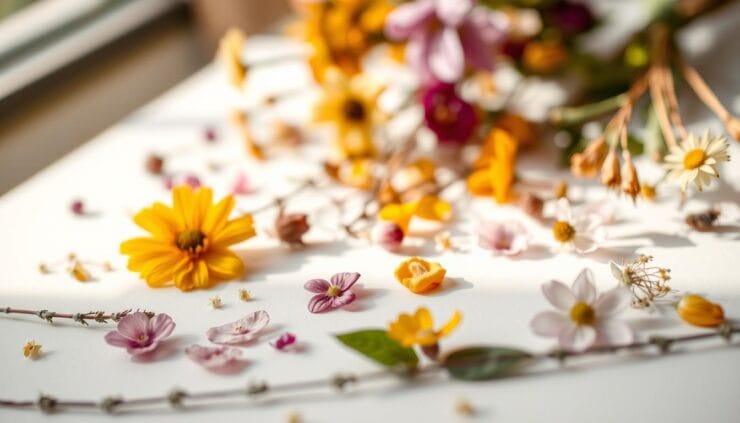
Getting Started with Pressed Flower Art
Our DIY guide is perfect for anyone looking to learn how to make pressed flower art. We’ll show you the steps to create beautiful pressed flower art pieces. You can display them in your home or give them as gifts!
Key Takeaways
- Learn the basics of pressed flower art with our DIY guide
- Discover the materials needed to get started with pressed flower art
- Find out how to make pressed flower art with easy-to-follow steps
- Get inspired by different ideas for displaying your pressed flower art
- Start creating your own pressed flower art pieces with our helpful tips and guidance
Let’s get started on your pressed flower art journey! 🌸💕 We’re excited to help you learn how to make pressed flower art. Create beautiful, unique pieces that you’ll treasure forever!
Introduction to Pressed Flower Art
Get ready to explore a world of beauty and creativity with pressed flower art! This hobby lets you keep flowers forever and make stunning art. We’re excited to show you the beauty of pressed flower art and its many benefits.
Pressed flower art is a fun DIY project for everyone! It doesn’t matter if you’re an artist or just starting out. You’ll love making beautiful art with pressed flowers. It’s great for reducing stress and making special gifts.
What is Pressed Flower Art?
Pressed flower art is a way to dry and keep flowers to make detailed designs. It needs patience, care, and a love for nature. With this art, you can make pieces that show your personality and style.
Benefits of Creating Pressed Flower Art
So, what are the benefits of making pressed flower art? Here are a few:
- Reduces stress and anxiety
- Encourages creativity and self-expression
- Provides a fun and easy DIY project for all ages
- Allows you to create personalized gifts and decorations
- Helps you connect with nature and appreciate its beauty
As you can see, pressed flower art is a wonderful hobby. It’s great for relaxing, being creative, or enjoying nature. So, let’s start and explore the world of pressed flower art together!
Materials Needed for Pressed Flower Art
To start with pressed flower art, you’ll need some basic stuff! 🎨 We’re excited to share the essential tools and supplies for this beautiful craft. The right materials can make a big difference in your creations.
For the best flowers to press, pick delicate ones like roses, carnations, and baby’s breath. These flowers will help you get the perfect, detailed designs. You’ll also need heavy books, paper, and a flower press to flatten your flowers.
- Choose flowers with thin petals for easier pressing
- Use paper towels or blotting paper to absorb excess moisture
- Invest in a good quality flower press for optimal results
By following these tips and using the right materials, you’ll be on your way to creating beautiful art. Remember to have fun and try different flowers and techniques. This will help you find what works best for you! 🌺👍
Different Methods of Pressing Flowers
Now that we’ve covered the basics of pressed flower art, let’s look at different ways to press flowers. You can get stunning results with a few simple steps. We’ll check out the traditional method, quick pressing with a microwave, and other techniques.
There are many ways to press flowers, each with its own perks. For instance, the traditional method uses paper and heavy books. It’s perfect for delicate flowers and lets you control the process well.
Traditional Pressing Method
This method is a timeless favorite for pressing flowers. It’s simple and needs little gear. Just put your flowers between paper, weigh them down, and wait a few weeks. You’ll get beautifully pressed flowers!
Using a Microwave for Quick Pressing
Need flowers fast? The microwave can help. It’s best for thicker flowers like roses. Place your flowers between paper, microwave in short bursts, and check until they’re dry.
Alternative Pressing Techniques
There are many other ways to press flowers, like using a flower press or air-drying. These methods take more effort but can yield amazing results. For example, a flower press can dry many flowers at once, or air-drying can give a delicate look.
Here are some tips for pressing flowers:
- Choose the right paper: Pick something absorbent that won’t leave marks on your flowers.
- Play with times: The pressing time varies based on the method and flower type.
- Be patient: Pressing flowers takes time, so don’t rush it!
How to Prepare Flowers for Pressing
Preparing flowers for pressing is key to making beautiful pressed flower art! 🌼👍 You need to pick the right flowers and handle them carefully. Think about the type of flowers you want and when to harvest them. For example, delicate flowers like roses and carnations do best in the morning. Thicker flowers like sunflowers and daisies can be picked at any time.
It’s important to clean and dry the flowers well. Use a soft brush or a damp cloth to remove dirt. Then, place the flowers on a paper towel or clean cloth without overlapping them. This prevents moisture buildup and keeps the flowers from molding or losing color.
- Choose flowers that are fresh and free of damage
- Harvest flowers at the right time of day for optimal results
- Handle flowers gently to avoid bruising or damaging them
By following these tips and preparing your flowers well, you’ll make stunning pressed flower art. This art will last for years! 🌺🚿
Step-by-Step Guide to Creating Pressed Flower Art
Now it’s time to get creative! 🎨🌼 We’re excited to share a step-by-step guide to creating pressed flower art. This process is all about preparing the pressing surface and arranging your flowers in a way that brings out their natural beauty. With a little patience and practice, you’ll be creating stunning pieces of art in no time!
To start, let’s talk about the importance of preparing the pressing surface. This is a crucial step in ensuring that your flowers are pressed evenly and without any damage. You’ll want to use a surface that is flat and smooth, such as a piece of cardboard or a pressing board. Once you have your surface ready, you can begin arranging your flowers in a way that looks beautiful to you.
- Choose flowers that are similar in size and shape to create a cohesive look
- Experiment with different patterns and designs to add visual interest
- Don’t be afraid to get creative and try new things – it’s all part of the process!
By following these tips and taking the time toprepare the pressing surface, you’ll be well on your way to creating beautiful pieces of pressed flower art. Remember to have fun and enjoy the process – it’s a great way to relax and express your creativity! 🌸👍
Creative Ideas for Displaying Pressed Flower Art
Now that you’ve made your beautiful pressed flower art, it’s time to show it off! You can turn it into stunning framed artwork that brings a personal touch to any room. Choose a white or light-colored frame to highlight your flowers. We love seeing your creative ideas for displaying pressed flower art!
Here are some ideas to get you started:
- Use your pressed flowers to create unique greeting cards and stationery
- Add them to a beautiful vase or bowl as a centerpiece for your dining table
- Create a stunning piece of framed artwork to hang on your wall

Remember, the key is to have fun and be creative! Your art can add a personal touch to any room. It makes your home decor special and meaningful. With a little imagination, you can come up with many creative ideas for displaying pressed flower art. Enjoy your beautiful framed artwork for years to come!
Tips for Preserving Your Pressed Flower Art
To keep your beautiful pressed flower art looking its best, you need to preserve it properly! 🌼👍 We’re excited to share some valuable tips on how to do just that. Preserving your art is an essential step in ensuring it remains a stunning piece for years to come. By following these tips for preserving pressed flower art, you’ll be able to enjoy your creations for a long time.
When it comes to preserving your pressed flower art, using protective coatings and sealing is a great way to protect it from damage. You can use a variety of materials, such as varnish or resin, to create a protective layer over your art. This will help prevent it from getting damaged by dust, moisture, or other environmental factors.
Protective Coatings and Sealing
Here are some tips to keep in mind when using protective coatings and sealing:
- Choose a coating that is specifically designed for preserving delicate materials like flowers.
- Apply a thin layer of coating to avoid overwhelming the flowers.
- Make sure the coating is completely dry before handling the art.
Proper storage techniques are also crucial in preserving your pressed flower art. You should store your art in a cool, dry place, away from direct sunlight and moisture. This will help prevent the flowers from fading or becoming damaged.
Proper Storage Techniques
By following these tips for preserving pressed flower art, you’ll be able to enjoy your beautiful creations for years to come. Remember to always handle your art with care, and avoid exposing it to harsh environmental conditions. With the right protective coatings and sealing, and proper storage techniques, you can keep your pressed flower art looking its best.
Combining Techniques: Mixed Media with Pressed Flowers
Ready to elevate your pressed flower art? Mix techniques and make stunning mixed media pieces! 🌼🎨 You can make your art special by adding different materials and elements. Let’s dive into some cool ways to boost your flower art.
Mixed media with pressed flowers opens up a world of possibilities! You can use paint or ink for color, or add leaves and twigs for texture. Combining techniques like these lets you create unique pieces that show off your style.
Here are some ideas to get you started:
- Add a few drops of ink to your pressed flowers for a beautiful, watercolor effect
- Use paint to create a background or add details to your flowers
- Incorporate other natural elements, like seeds or branches, to add depth and interest
By trying out different combining techniques and materials, you can show off your pressed flowers in new ways. So, don’t be shy to explore and try new things – you might discover amazing creations! 🌟
Remember, the fun part of making mixed media art with pressed flowers is to have fun and be creative! Don’t be scared to experiment and try new things. And don’t worry if your art doesn’t look exactly as you imagined. The journey of creating is just as valuable as the final piece, and you’ll learn and grow with each new creation.
Environmental Considerations in Flower Preservation
When we make our pressed flower art, we must think about the environmental considerations! 🌎👍 We aim to keep our hobby from harming the planet. Instead, we want it to add to the planet’s beauty and preservation. Using sustainable practices in our flower preservation is a key way to do this.
So, how can you make your pressed flower art more eco-friendly? Here are some tips:
- Choose local and native flowers to reduce carbon footprint and support local ecosystems.
- Use recycled materials for framing and displaying your art.
- Minimize waste by composting leftover flowers and using eco-friendly supplies.

By adding these sustainable practices to your pressed flower art, you’ll create beautiful pieces. You’ll also make your hobby more environmentally friendly! 🌼🌿
Troubleshooting Common Issues with Pressing Flowers
Working with pressed flowers can sometimes be tricky! 🌼 But don’t worry, we’re here to help. We’ll guide you through common problems like mold, discoloration, and flower size. We’ve got some useful tips to share.
To avoid mold and discoloration, it’s important to use the right materials and techniques. Here are some key tips:
- Use a clean and dry pressing surface to prevent moisture from building up.
- Choose flowers that are fresh and free of debris.
- Follow proper drying and pressing techniques to prevent mold and discoloration.
Managing flower size and thickness is also crucial. You want your flowers to look great in your final piece. Here are some tips for managing flower size and thickness:
- Use a variety of flower sizes and shapes to add depth and interest to your design.
- Experiment with different pressing techniques to achieve the desired texture and appearance.
- Don’t be afraid to trim or shape your flowers to fit your design.
By following these tips, you’ll be well on your way to creating beautiful pressed flower art. Remember to stay patient, have fun, and don’t be afraid to experiment and try new things! 🌺👍
Resources for Learning More About Pressed Flower Art
Now that you’ve started your journey in pressed flower art, you’re probably eager to learn more. We’ve got you covered! There are many amazing resources for learning, from books and online courses to websites and communities.
Let’s explore some of these resources together! You can find a wide range of books on pressed flower art at your local library or online. They cover topics from basic techniques to advanced designs. Online courses are another great way to learn, with many platforms offering classes and workshops on pressed flower art.
Discover New Resources
Some popular resources for learning include:
- Books: “The Art of Pressed Flowers” and “Pressed Flower Design”
- Online courses: “Pressed Flower Art” on Udemy and “Flower Pressing” on Skillshare
- Websites: The Pressed Flower Guild and The Flower Pressing Community
These resources will help you improve your skills and stay up-to-date with the latest trends and techniques in pressed flower art. Remember, practice makes perfect, so keep experimenting and having fun with your pressed flower art! 🌿👫
Conclusion: Your Pressed Flower Art Journey
As you finish this guide, we hope you feel more creative and excited. The art of pressed flowers is rewarding. It lets you preserve nature’s beauty and turn it into beautiful art.
Remember, each piece of pressed flower art is unique. It shows your style and the flowers you picked. Don’t be shy to try new things and enjoy the process!
Show off your creations and share them with others. You can frame them, use them in cards, or decorate your home. Your art will make people happy and inspire them.
Keep your creativity alive, keep learning, and enjoy the beauty of nature through pressed flowers. Your journey is just starting!


Add comment